-
C64 keyboard Info
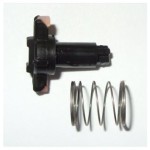
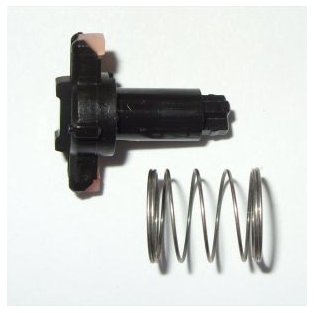
Breadbin/C64c Plunger 3mm
Over the years CBM changed the C64’s keyboard design several times. Apart from the obvious differences between the breadbin (brown keys) and C64C (white keys) there were revisions within each type. So far, I have discovered the following:
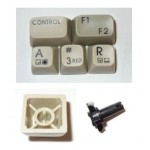
Breadbin keys:
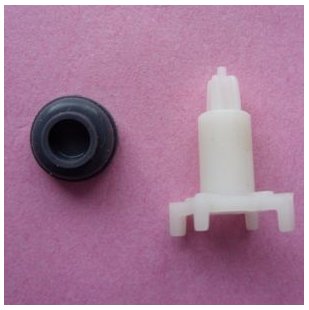
There are two main types: “Type 1” keyboards have metal springs under all keys and black plungers, and “Type 2” keyboards which have white four-pronged plungers with grey rubber bubble contacts (only the space bar has a metal spring underneath it). Type 1 and Type 2 keys / plungers are totally incompatible (and cannot be fitted to a different keyboard base).
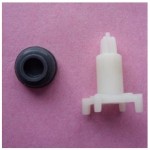
Breadbin Type 2
There are also two “Type 1” keycap / plunger variants: The earlier breadbin keyboards have plungers with an (approx) 5mm long cross-point key-cap fitting, on later types the cross-point is only (approx) 3mm long. The caps designed for 5mm plungers also fit 3mm plungers perfectly but key-caps designed for 3mm cross-point plungers do not fit 5mm plungers quite so well.
Other differences:
- Some breadbin keyboards have tan coloured function keys, on others they are grey.
- The font used varied – sometimes it is bold, other times it is thinner text.
- The top of the characters printed on the front can vary between 1-3mm down from the top of the keys.
C64C keys:
C64C Type 3 (Rare)
There are (at least) two main fitting types. “Type 1” fittings use the same 3mm plungers and springs as the breadbin keyboards, “Type 3” keyboards (which are relatively rare) have hollow slotted type plungers and slightly shorter springs (the keys have a more solid feel and are greyer in colour). “Type 1” and “Type 3” key-caps are not interchangeable.
There are two (cosmetic) designs of “Type 1” C64C key-caps. The earlier keyboards had the text and symbols printed on the top and front sides (similar to the breadbin) with RETURN, SHIFT etc printed centrally. The later types had everything printed on the key tops, with RETURN, SHIFT offset to the corners. As mentioned, this is a cosmetic issue – the fitting is same.
Just to make things more confusing, there is a rare variety of C64C keyboard which has similar looking keys to the “Type 3” shown above but they have a cross-point plunger fitting, which is a very loose fit on standard “Type 1” 3mm plungers (but Type 1 keys fit their plungers just fine!). These keyboards have a black-backed shiftlock keyswitch (and one of its wires goes diagonally to the PCB). Also, the main body of the keyboard unit has different cut outs in the black plastic meaning it wont fit in the clip-together type C64C case.
The keys I sell on retroleum.co.uk will have been sourced from several machines. I have separated them into breadbin, C64C Types 1, 2 ,3 and graded them regarding the extent of the age-yellowing as these are the main considerations when replacing them. However, my Type 1 key-caps will have the 3mm or 5mm fitting (randomly), which is why I provide an appropriate plunger with each – if it comes to it, the keyboard can be dismantled and the individual plunger replaced to suit the new cap – but this is not normally necessary.
Apart from the age-yellowing issue which I have dealt with the best I can by sorting into colour grades, the style of font does vary slightly (essentially, thin or bold text). However, when replacing a single key any difference is rarely noticeable.
Repair:
Apart from missing keys and broken plungers the most common fault with C64 keyboards will be keys becoming unresponsive / requiring force to register*. This is caused by dust on the backplate PCB or dirt stuck to the plungers’ conductive rubber pads and can be easily cleaned. To dismantle the keyboard, about 20 small gold-coloured screws have to be removed from the back and two wires de-soldered from the shift lock switch. Once this is done, the backplate PCB can be removed. (Warning: With Type 2 keyboards, the grey bubble contacts are loose and will likely come away – these can be very tedious to put back. On Type 1/3 keyboards, there’s no danger of plungers falling out unless their associated keycap is missing).
The contacts on the PCB will either be gold or carbon plated – obvious dust can just be wiped off and stubborn marks cleaned with isopropyl alcohol on a cotton bud. A pencil eraser can be used to brighten up the gold contacts if necessary, but this should not be used on carbon-coated contacts. The conductive rubber pads on the plungers should also be given a wipe using an isopropyl alcohol soaked cotton bud.
* If entire rows / columns of keys are totally dead, suspect a broken wire in the keyboard cable, its connector or a bad CIA chip (U1)
Notes:
- The keyboard module as a whole is electrically compatible and interchangeable across all C64s, (even between breadbin and C64C, however the cable on C64C keyboards is usually too short for them to be used in breadbins).
- “Type 1”, “Type 2” etc is my own terminology.